Real-Time Face Recognition on Raspberry Pi
Recently, I’ve been experimenting with face_recognition, a Python-based face recognition library. The author demonstrated real-time face recognition using a webcam on a desktop, as shown in the following example:

I wanted to replicate this effect on a Raspberry Pi. If embedded devices can achieve this, it would be amazing—just like something from a movie.
Installation Steps
You can follow the installation guide from the project page: Raspberry Pi 2+ installation instructions. I’m using a Raspberry Pi 2B with a quad-core 900MHz CPU and 1GB RAM (though face_recognition only uses one core). I’ve overclocked the CPU to 1050MHz. (For details about overclocking, check out my blog post: Performance and Power Consumption of Overclocked Raspberry Pi)
Below are the steps I followed. (I won’t cover how to install the system itself—there are plenty of tutorials online. Make sure to change your apt sources; I used USTC’s mirror as I’m in a university network.)
First, install a bunch of required libraries:
| |
If you’re using the Raspberry Pi camera module (CSI interface), run the following:
| |
Download and install dlib:
| |
Install face_recognition:
| |
Clone the example code and try running it:
| |
At this point, I encountered an error about a missing library. Normally, we can search for the package name with apt-cache search <library_name> and then install it using sudo apt-get install <package_name>.
The error mentioned a missing libatlas.so.3. After running apt-cache search libatlas, I found that the package name is libatlas3-base, so I installed it with:
| |
You’ll encounter similar issues when testing the camera, and the solution is the same.
After installation, the code ran successfully.
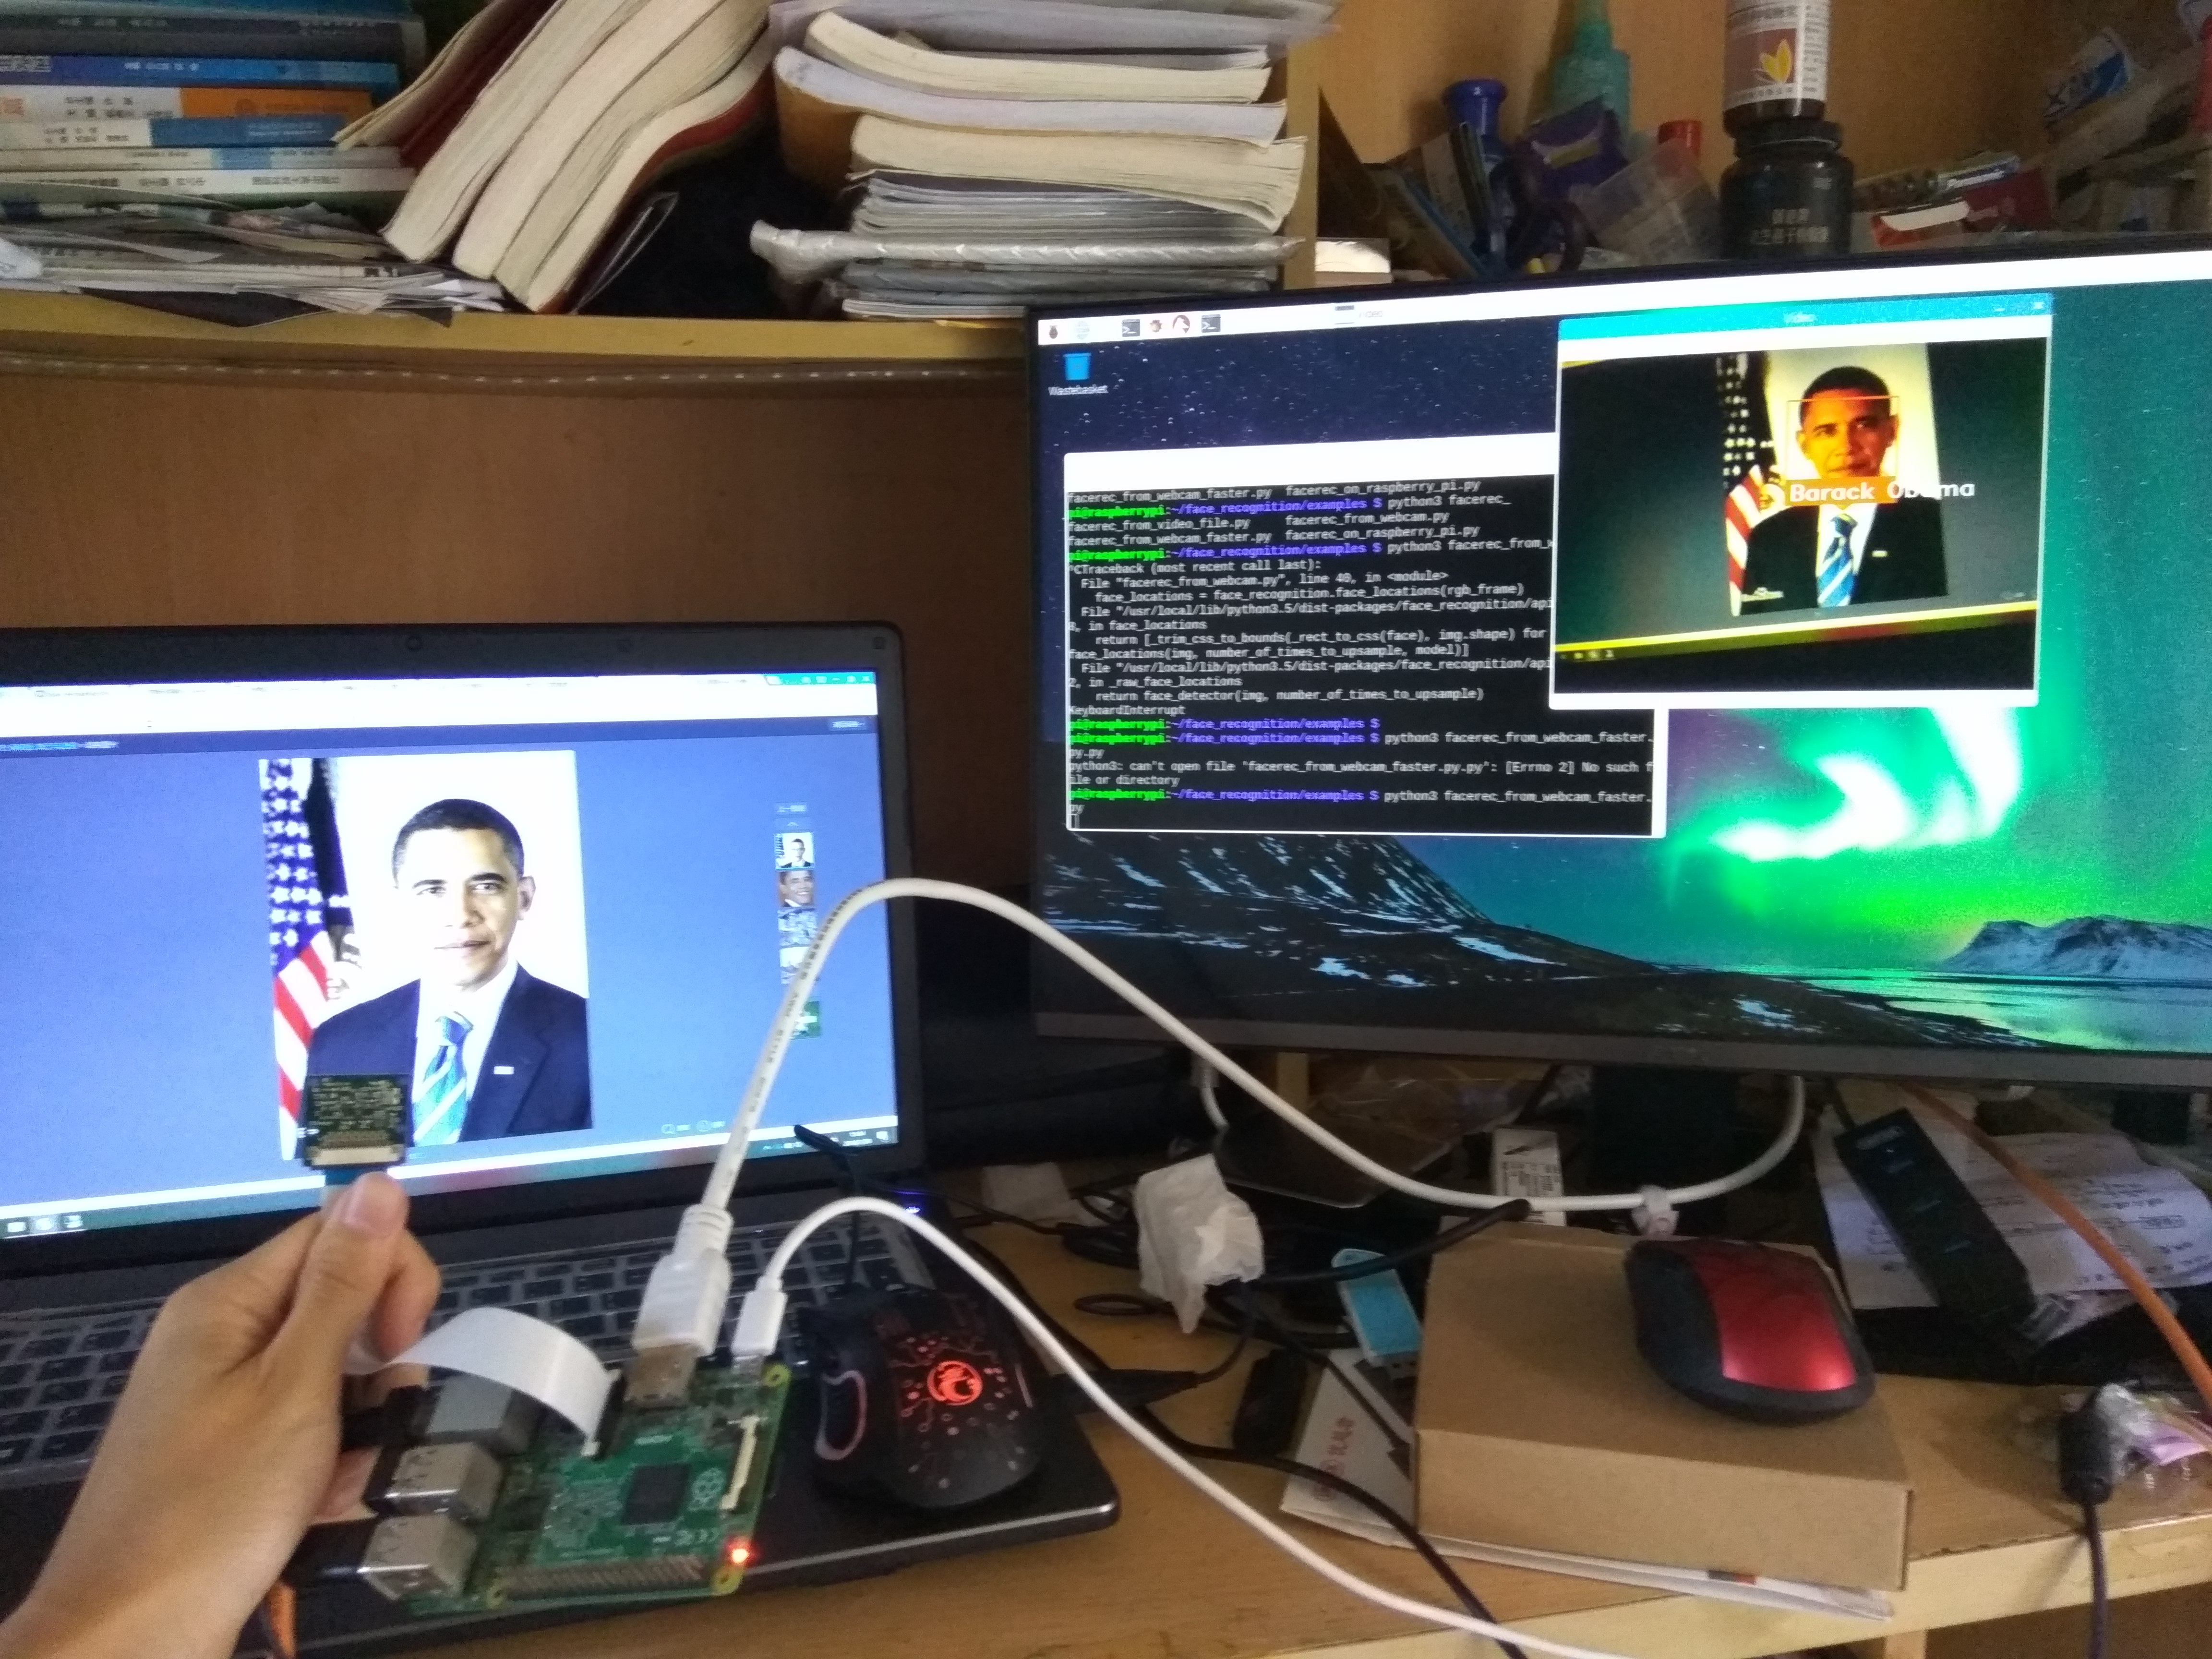
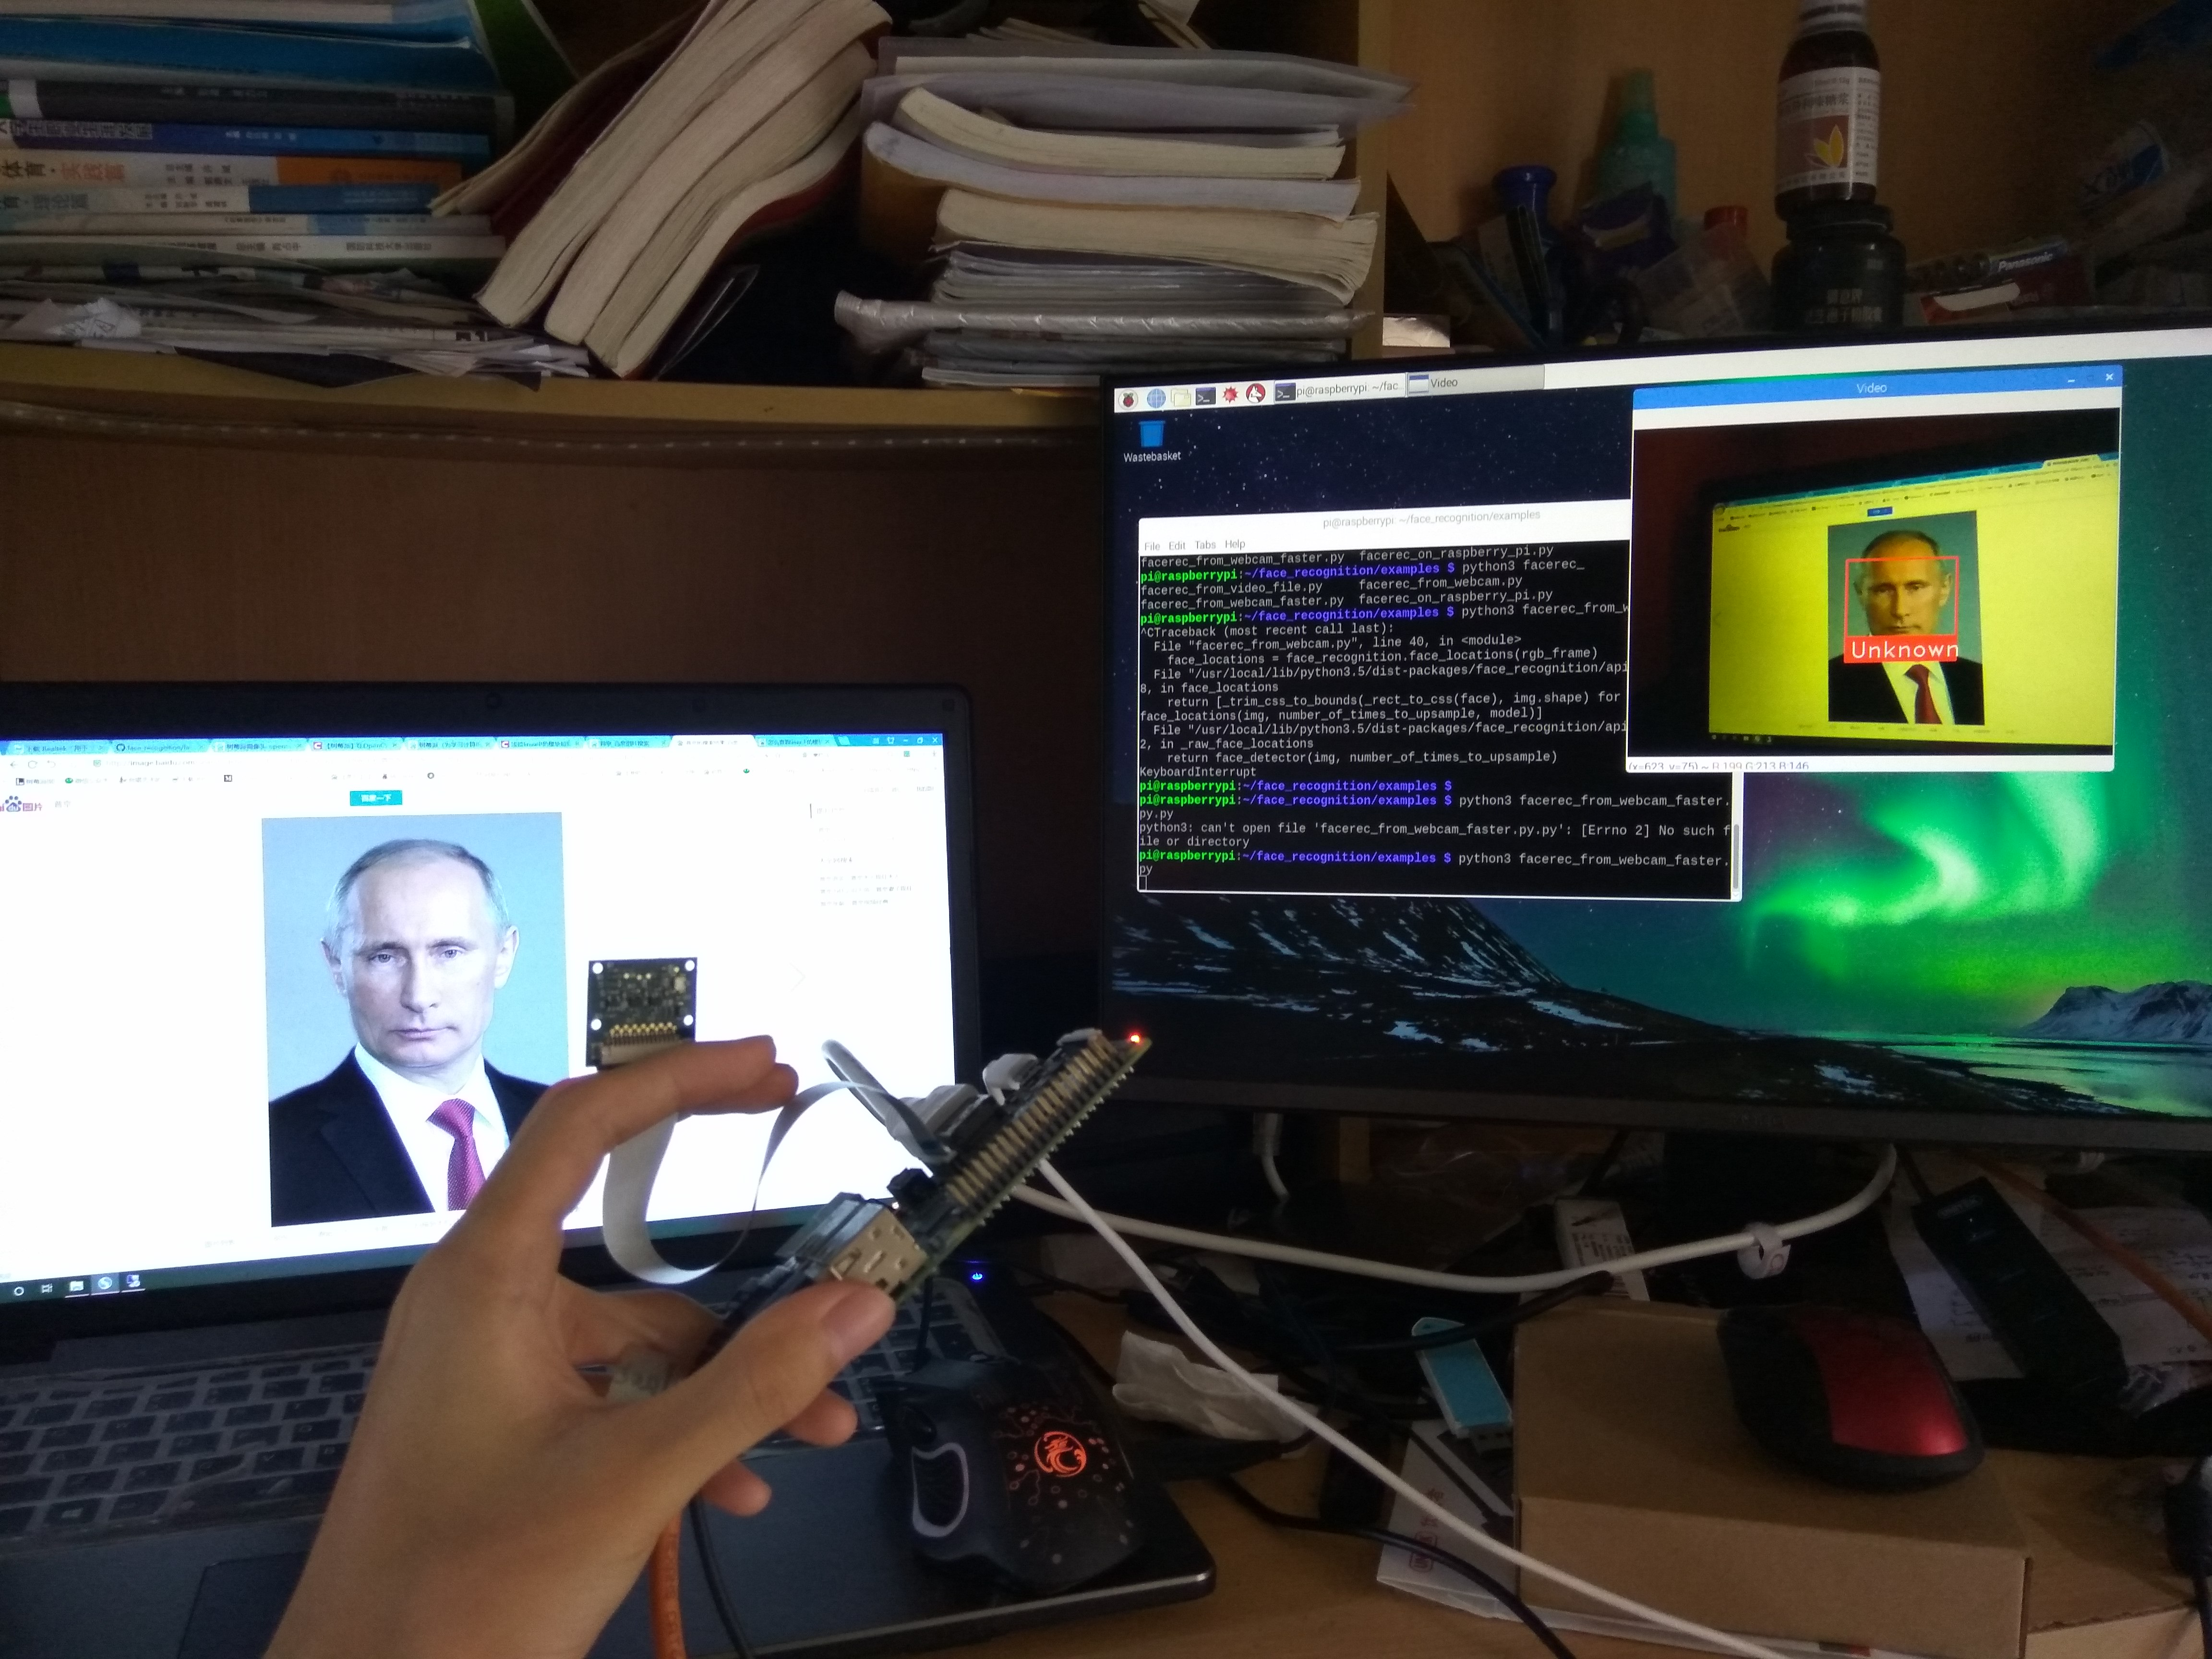
Our goal is real-time face recognition on the Raspberry Pi, so I connected the camera module (CSI interface), enabled the camera in raspi-config, and rebooted. (If you’re unfamiliar, search for “how to use Raspberry Pi camera module”.)
Then, I ran the real-time face recognition code:
| |
An error occurred during import cv2, complaining about missing libraries. Just follow the instructions and install the missing libraries. You may need to go through a few rounds of installing missing dependencies before everything works.
Next, the program threw another error at this line:
small_frame = cv2.resize(frame, (0, 0), fx=0.25, fy=0.25)
This happened because video_capture.read() failed to grab a frame. But the camera was connected, so why was it not reading properly? Was the camera broken? No.
This is because the Raspberry Pi camera module is loaded as firmware under
/boot/, and not as a standard V4L2 camera driver. Therefore,/dev/video0does not exist. Source: Using CSI Camera in OpenCV on Raspberry Pi
To resolve this, load the V4L2 driver module manually:
| |
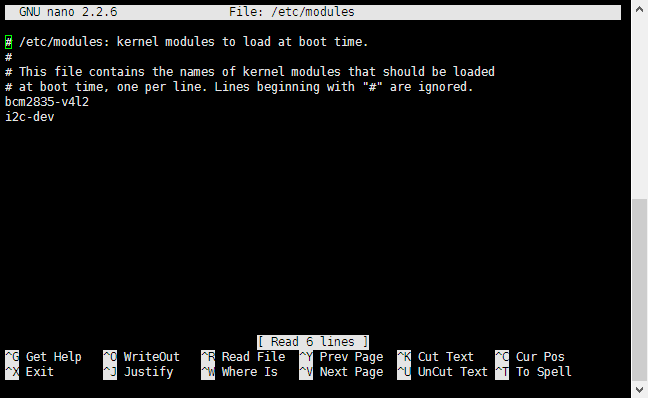
To load it automatically on boot, edit /etc/modules and add:
| |
As shown below:
Now run the code again:
| |
This time it works! A video window appears showing the camera feed. Here’s what my test looked like: