Introduction
- For more information about distributed FFMPEG transcoding, please refer to my earlier blog: https://blog.csdn.net/imdyf/article/details/80621009
- Source code is available on GitHub: https://github.com/chn-lee-yumi/distributed_ffmpeg_transcoding_cluster
- In fact, the cluster can consist of CPUs with different architectures. You can use several Raspberry Pis along with some x86 PCs; they can work together. We’ll discuss this at the end of the article.
- We’ll start by building a cluster using only Raspberry Pis. I used a Raspberry Pi 2B and a Raspberry Pi 3B. My computer runs Windows 10, which is used to flash the OS and configure the Raspberry Pis.
- There are three types of cluster node roles: controller (one), compute (at least one), and storage (one). Each node can serve one or more roles. Our role assignment is as follows:
| Node | Role(s) |
|---|
| Raspberry Pi 3B | Controller, Compute, Storage |
| Raspberry Pi 2B | Compute |
Preparation
- First, download the latest Raspberry Pi image from raspberrypi.org. I used Raspbian. Then flash it to a TF card using Win32DiskImager. After flashing, create an empty file named
ssh in the boot partition. You can now boot up the Raspberry Pi. - After booting, find the IP address of the Pi via your router’s admin page. Then use PuTTY to connect via SSH. Default username is
pi and password is raspberry. - My Raspberry Pi 2B has IP:
10.1.1.3; the 3B has IP: 10.1.1.172. - No matter the node, always perform this step first:
- Switch to a local (China) software source. I used Tsinghua University’s mirror. Follow the instructions here: https://mirrors.tuna.tsinghua.edu.cn/help/raspbian/ and run:
1
| sudo nano /etc/apt/sources.list
|
Replace the contents with:
1
2
| deb http://mirrors.tuna.tsinghua.edu.cn/raspbian/raspbian/ stretch main non-free contrib
deb-src http://mirrors.tuna.tsinghua.edu.cn/raspbian/raspbian/ stretch main non-free contrib
|
- Press
Ctrl+O to save, then Ctrl+X to exit. - Run
sudo apt-get update to update sources.
Raspberry Pi 3B Configuration
Storage Setup
- Shared storage is essential in this cluster. Let’s set it up:
1
2
3
4
5
6
7
8
| sudo apt-get install nfs-kernel-server
sudo chmod 777 /var/lib/nfs/.etab.lock
sudo chmod 777 /var/lib/nfs
sudo mkdir -p /srv/distributed_ffmpeg_transcoding_shared_files
sudo chmod 777 /srv/distributed_ffmpeg_transcoding_shared_files
mkdir /srv/distributed_ffmpeg_transcoding_shared_files/upload
mkdir /srv/distributed_ffmpeg_transcoding_shared_files/tmp
mkdir /srv/distributed_ffmpeg_transcoding_shared_files/download
|
Replace its contents with:
1
2
| /srv/distributed_ffmpeg_transcoding_shared_files/upload 10.1.1.3(ro,insecure)
/srv/distributed_ffmpeg_transcoding_shared_files/tmp 10.1.1.3(rw,insecure)
|
- If you have three compute nodes (10.1.1.3–10.1.1.5), update the lines as follows:
1
2
| /srv/distributed_ffmpeg_transcoding_shared_files/upload 10.1.1.3(ro,insecure) 10.1.1.4(ro,insecure) 10.1.1.5(ro,insecure)
/srv/distributed_ffmpeg_transcoding_shared_files/tmp 10.1.1.3(rw,insecure) 10.1.1.4(rw,insecure) 10.1.1.5(rw,insecure)
|
- If the storage node is also a compute node, it doesn’t need to mount the NFS.
- Run the following to apply changes:
Compute Setup
- Very simple: just install FFMPEG:
1
| sudo apt-get install ffmpeg
|
Controller Setup
- First, set up passwordless SSH. Run:
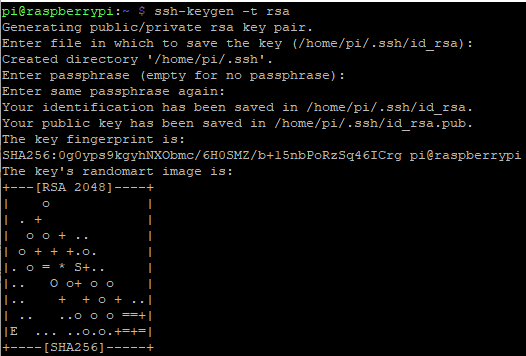
Just press Enter through all prompts.
- Then copy the public key to the Raspberry Pi 2B (IP:
10.1.1.3):
1
| ssh-copy-id -i ~/.ssh/id_rsa.pub 10.1.1.3
|
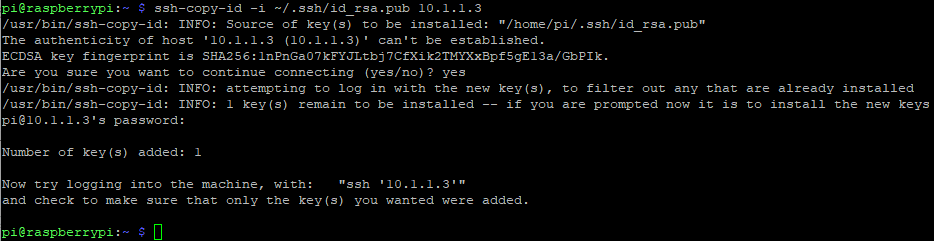
Type yes when prompted, then enter the password raspberry.
- Also copy the key to the Raspberry Pi 3B itself (since it’s also a compute node):
1
| ssh-copy-id -i ~/.ssh/id_rsa.pub 10.1.1.172
|
Repeat for any additional compute nodes.
- Now download the control script:
1
2
| wget https://raw.githubusercontent.com/chn-lee-yumi/distributed_ffmpeg_transcoding_cluster/master/dffmpeg.sh
chmod +x dffmpeg.sh
|
- Open and modify configuration:
Modify the following:
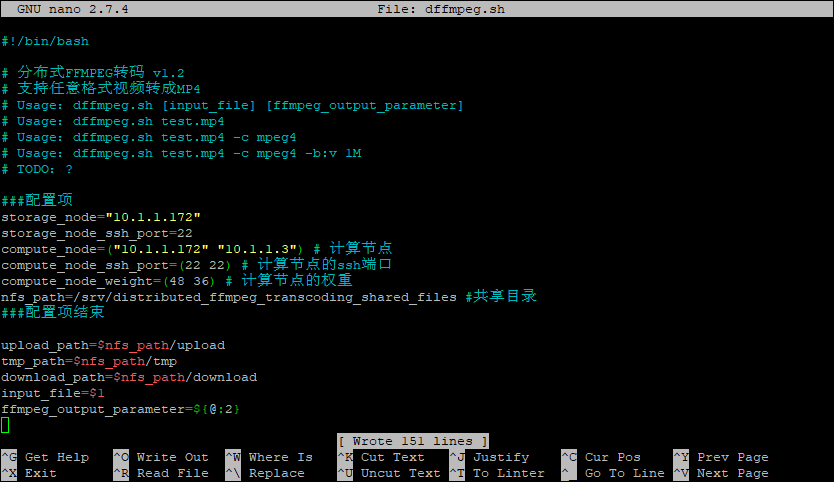
(Assign higher weights to more powerful nodes.)
1
| sudo apt-get install bc
|
Raspberry Pi 2B Configuration
- This node is only a compute node. Install FFMPEG and mount shared storage:
1
2
3
4
5
6
7
| sudo apt-get install ffmpeg
sudo mkdir -p /srv/distributed_ffmpeg_transcoding_shared_files
sudo chmod 777 /srv/distributed_ffmpeg_transcoding_shared_files
mkdir /srv/distributed_ffmpeg_transcoding_shared_files/upload
mkdir /srv/distributed_ffmpeg_transcoding_shared_files/tmp
sudo mount 10.1.1.172:/srv/distributed_ffmpeg_transcoding_shared_files/upload /srv/distributed_ffmpeg_transcoding_shared_files/upload
sudo mount 10.1.1.172:/srv/distributed_ffmpeg_transcoding_shared_files/tmp /srv/distributed_ffmpeg_transcoding_shared_files/tmp
|
(10.1.1.172 is the IP of the storage node, which is the Raspberry Pi 3B.)
Testing
- Testing is done on the controller. Download a test video:
1
| wget https://github.com/chn-lee-yumi/distributed_ffmpeg_transcoding_cluster/blob/master/test_video.mp4?raw=true
|
1
| mv test_video.mp4?raw=true test_video.mp4
|
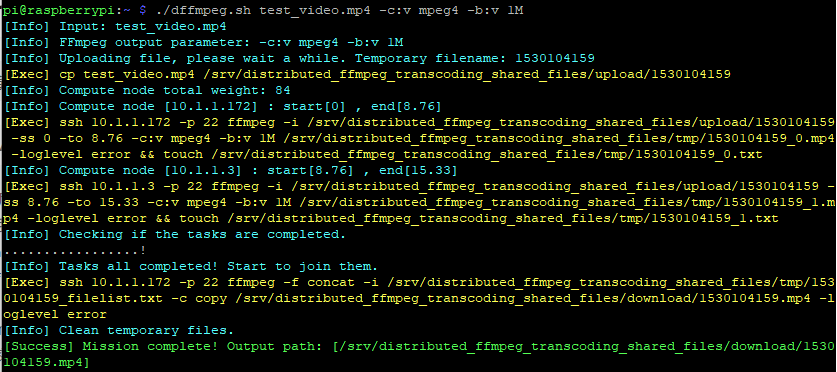
- Then run the transcoding test:
1
| ./dffmpeg.sh test_video.mp4 -c:v mpeg4 -b:v 1M
|
This converts test_video.mp4 to MPEG-4 format with a 1 Mbps video bitrate.
Conclusion
- We encountered a strange bug:
ffmpeg was still running, yet the script continued and executed the touch command, which led to errors in final video merging. A temporary workaround is to increase the sync_wait_time in the control script. The root cause is unknown, but it’s not related to NFS usage, since the issue also occurs on nodes not using NFS. This remains to be fixed. - x86 machines can also be added to the cluster. Just install FFMPEG, set up passwordless SSH, mount the shared storage, and add them to the control script.